Fair Winds,
Chris and Debbie
|
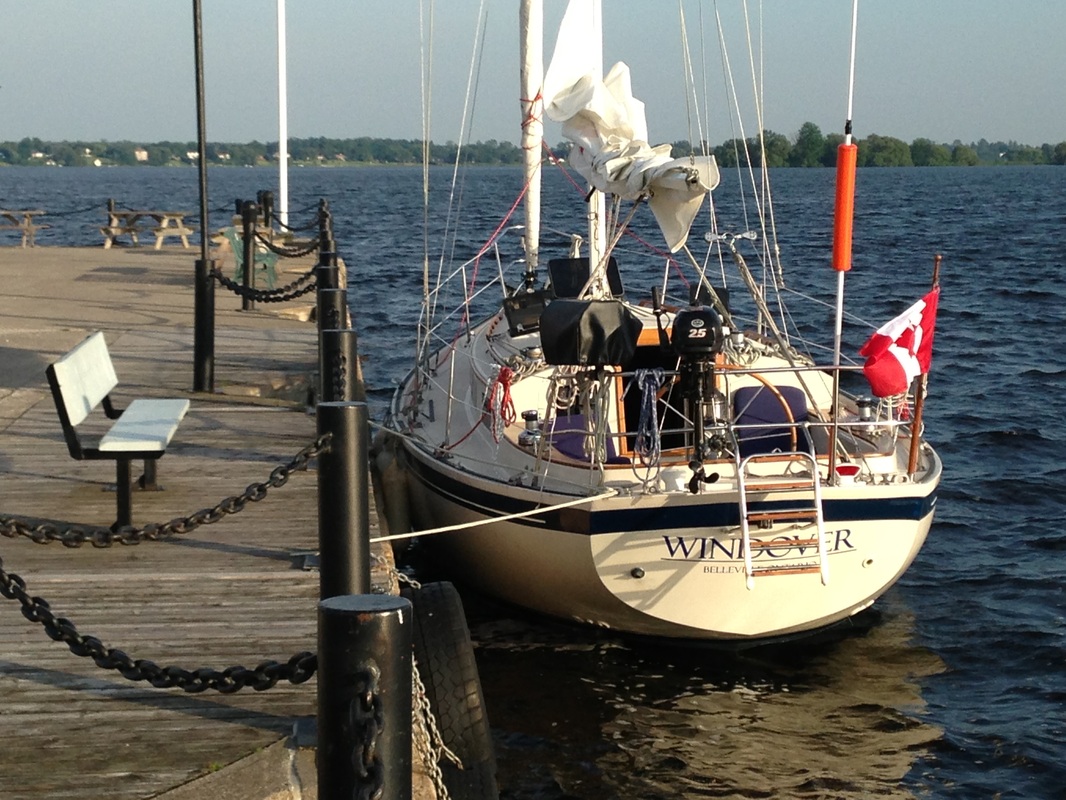
We intend to keep you up to date on our progress with the restoration of "Windover", our 1986 Aloha 32. Please check back regularily to join in on the discussion. Your best wishes, comments and advice are always welcome. We are sure to come up against some challenges along the way and are depending on all of you to assist in overcoming them. Stay tuned, we will be updating regularly.
Fair Winds, Chris and Debbie
9 Comments
Bob
10/18/2013 07:12:45 am
I met you at CFB Trenton Yatch Club today. I'll follow up on your project and hopefully pick up some good points and techniques that I can apply to my 1985 Alogha 32 "Penqwyn. I;m looking for repalcement instruments to replace the origanl SR Mariner Instruments that they no longer make.
Reply
Hi,
Reply
Chris (owner of Windover)
5/19/2014 09:19:40 pm
The holding tank replacement went well. Be prepared to do a bit of work to get the new hoses routed. We found a new/used tank that one of our friends was giving away. It is an 18 gallon unit with a sending unit to tell you when it is nearly full. Our friend was upgrading his tank and gave us this one nicely cleaned and ready for install. We had thought early on to have it made larger at a plastic welder. We finally decided to use it as is because it was only the two of us sailing and we thought it would suffice. Besides, the price was right. Our tank sits under the starboard double berth (our boat is the forward workshop layout). The fittings were all found at local hardware stores. First we routed all the pipe. Quite a chore to get them in but we did it. Next we changed out the vent hose. Quite often people over fill the tank, the vent hose gets plugged with nasty stuff and then the tank always stinks. Originally the boat had vent hose made from the grey pipe used for fresh water. We changed it out to braided silicone hose. Next we installed the tank. We used a heat gun to soften the hose and put lip balm....yes, actual lip balm on the fittings to aid in installation. Then we slipped on the clamp and slid the hose on the fitting. Easy as pie and no grunting and straining. This was my wife's idea we will use a heat gun from now on...makes the job really easy. We will be updating the site shortly. We just finished the refurb and have only some minor stuff to do....oh and a new furler to install, not so minor. Then we will have time to play on the site. Lots of pics and info coming.
Reply
Chris
5/20/2014 04:10:45 am
Great to hear from you. Our A32 is the V berth model with holding tank up front. Headed to Marine Outfitters in Kingston this weekend for the new tank (they have the best prices on just about anything). Will definitely use your "heat and lip balm" suggestion. Many people break the new tank by forcing the hose onto the fittings.
Reply
John McMullen
10/24/2014 05:59:40 am
Read with interest your web site. Recall Windover when she was for sale, but never traveled to take a look. Instead, purchased Annie's Song - first 5 of your sister ship photos. Having a great time learning our "new" boat. And yes, a few projects.
Reply
Chris (Owner of Windover)
10/24/2014 07:01:26 am
John: Great to hear from you. You bought a real beauty. Hope you don't mind us using your boats photo's on our site.
Reply
Tom Overton
10/24/2016 01:29:37 pm
I have a question. I saw on a youtube video that you pulled your W21 from your Aloha 32. What modifications did you have to make to the hull and or surrounding motor area to be able to pull the engine from the boat? Tom Overton
Reply
Chris (Owner of Windover)
10/25/2016 08:48:58 pm
Tom: First I should mention that we have the "non V-berth model"...The removal was quite simple really. The trims from the sides of the two adjoining berths had to be removed. This involved drilling out the bungs and removing wood screws, as well as trims nailed onto the engine box. These were just outside corner trims nailed on with fine finishing nails or brad nails perhaps. As I recall the front or frame of the front opening of the engine box was screwed in place through blocks fastened to the side panels. Once removed we laid lumber on carpet to a level even with the engine bed, unbolted the mounts and prop shaft from the tranny and slid it forward manually. I put a hose clamp on the prop shaft for my own peace of mind.....I know the prop would hit the rudder before it slipped out....Once we could get the cable from our mast crane above the engine lift tabs we did the rest with the crane. One man inside and one outside and we just guided it out. Quite an easy job really. It went back even better than it came out. Good luck with that. As a side note, if you are planning on doing this, buy Mercruiser engine mounts to replace the Westerbeke ones if you are replacing them. They seem to be exactly the same but without the red paint. My mechanic discovered this and sold me a set. They worked great.
Reply
Anne and Bill Franchetto
7/8/2018 09:07:30 am
We too were owners of an Aloha 32 Mark Ellis Design 1988
Reply
Leave a Reply. |
AuthorsChris and Debbie Verra are a couple of sailing nuts living near Belleville Ontario, Canada. They have four daughter, two cats and a dog to concern themselves with. Join in the fun as they renovate their latest vessel a 1986 Aloha 32.....and a Chrysler 26......and their house....man it is going to be a busy winter. Archives
October 2016
Categories |